
MYSTORYBOT KNOWLEDGE BASE
How to Get the Best Results from MyStoryBot
A practical guide explaining how every input, toggle, and reference image affects the consistency and quality of your generated storybook.
Starting a New Story
When you open the creation page, you'll see two modes at the top:
Story from Prompt
Type a short idea — one or two sentences is best. MyStoryBot writes the full narrative, creates characters, and illustrates every page. You control the length with the page count slider (7–36 pages).
"A shy octopus who learns to paint by watching the sunset."
Illustrate My Manuscript
Paste your finished text. MyStoryBot breaks it into pages, extracts character descriptions, and generates matching illustrations. The page count comes from your text — no slider needed.
Creation Settings & What They Control
Look below the prompt or manuscript. Choose the style, shape, and text layout before you select Go.
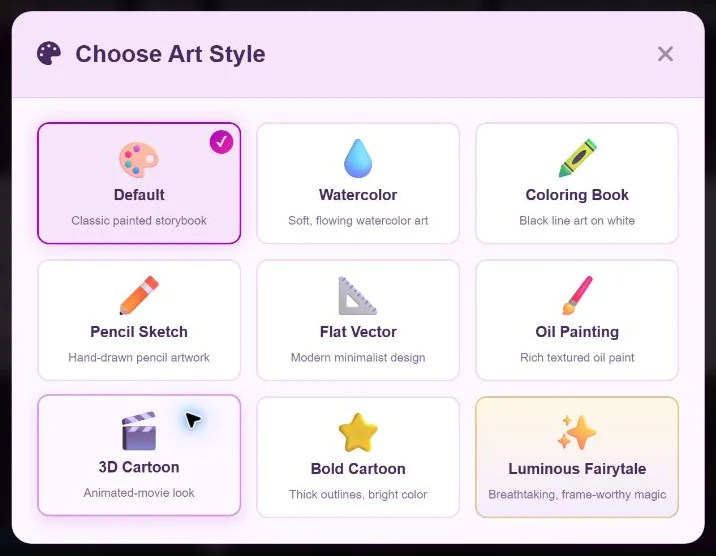
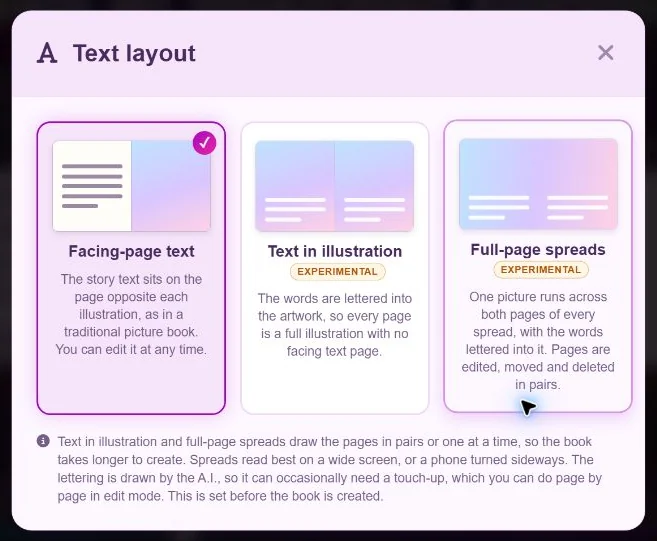
The Character Reference Sheet
This Is the Most Important Input for Consistency
Before any pages are illustrated, MyStoryBot generates a Character Reference Sheet — a side-by-side lineup of every character showing their appearance, clothing, proportions, and style.
Every single page illustration receives this sheet as input. It is the anchor that makes your characters look the same on page 2 as they do on page 15. If the reference sheet is wrong, every page will inherit those issues.
The Character Review Step
After you submit your prompt, MyStoryBot generates the character sheet and pauses for your approval. You'll see a preview with these options:
- Use the pencil to Describe a change to the sheet, or use Redraw to generate a new version.
- Undo / Redo — step back and forth through versions.
- Approve & Generate Story — locks in the character sheet and begins full generation.
Take your time here. Getting the character reference right before generation saves significant editing later.
What Makes a Good Reference?
- Clear, full-body views on a simple background.
- Distinct clothing, colors, and features.
- If uploading your own: well-lit, uncluttered images work best.
- You can replace the character reference later in edit mode if needed.
How Page Generation Works
When you approve the character sheet and generation begins, here's the actual sequence:
Key insight: Character Reference Sheet + Art Style + Scene Prompt are the three inputs that shape every illustration. The character reference keeps identity stable, the art style keeps aesthetics consistent, and the scene prompt controls what's actually depicted.
Editing Your Story
When your book is ready, choose Read my story first or Read my story to review the pages yourself. Select Edit, turn to the page you want, and use the controls at the bottom of its illustration. Select Done to return to reading.
Redraw
Creates a new illustration from the scene description and the supplied references.
- Update the scene description to explain what should appear in the new illustration.
- Review the reference thumbnails, then select Redraw page.
Use Redraw when the composition, character design, or action needs a new treatment.
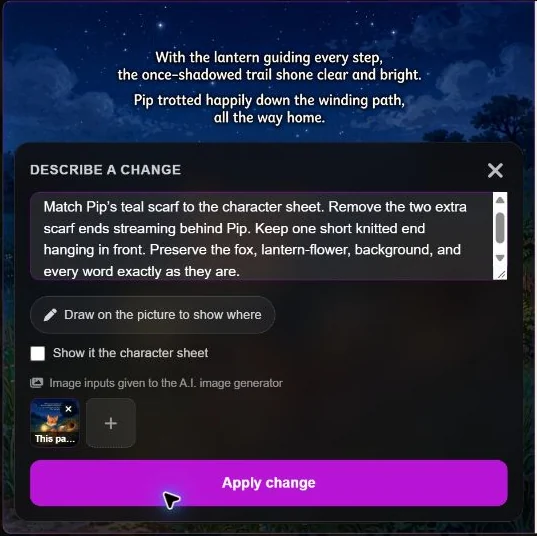
Change
Uses the current illustration as the starting image for a targeted edit.
- Describe one change, such as a missing prop or a wrong color, then select Apply change.
- On an interior page, use Show it the character sheet when the edit needs the approved design.
- Use Draw on the picture to show where if a mark would help identify the area to change.
Upload Your Art
Select the Photo icon in the illustration toolbar to replace the art with a PNG, JPEG, or WebP. You can use Undo to restore the previous image.
Use for hybrid books where some pages are hand-drawn or externally created.
Undo
Use the Undo and Redo arrows on the illustration to step through its versions.
Reference Image Inputs — How They Affect Results
When you redraw an interior illustration, the composer shows the references available for the new image.
Anchors character identity, clothing, proportions, and art style across every page.
A prior page's illustration. Carries forward setting, lighting, objects, and atmosphere.
A second prior page for additional visual context and scene continuity.
How to Customize References
When to Add, Remove, or Change References
Keep references when:
- Same location across pages (the forest should look the same).
- Characters interact with recurring objects or settings.
- You want smooth visual flow between scenes.
Remove references when:
- The scene changes location entirely (bedroom to park).
- Time of day shifts (day to night).
- A previous page had unwanted details bleeding into the new illustration.
- You want a completely fresh take.
Power move: Page 12 takes place in the same forest as Page 4? Remove the default adjacent pages and add Page 4 as a reference — the forest will match even though it's 8 pages apart.
Cover Page vs Interior Pages
Book Designer
Select Designer in the story reader or open Book Designer from the site menu.
Layout & Review
- View your book as two-page spreads — exactly as they'll print.
- Switch between layout formats to match your print provider.
- Toggle print guides to check safe areas, margins, and bleed zones.
- Upscale illustrations for higher print resolution.
Export
- Interior PDF — all interior pages in your chosen layout.
- Cover Wrap PDF — front, spine, and back as one printable sheet.
- Booklet PDF — fold-and-staple format for home printing.
For Amazon KDP, select KDP and check the layout before exporting both PDFs. See the cover wrap and manuscript exported for Pip and the Moonseed.
Sharing & Narration
Share
Every story has a unique link. Share it with collaborators, beta readers, or family — they can view the full story with illustrations.
Narration
Choose from a variety of narrators. Each page can be read aloud with natural, expressive voices — perfect for bedtime or classroom previews.